- Hook: Daiichi 1750 size 6-10
- Thread: white 8/0 uni thread
- Tail: white marabou blood quill
- Body: white chenille (lead optional)
- Hackle: white whiting saddle cape or strung saddle
Tying the Reverse Tied Wooly Bugger:
 |
| Step One: Lay thread base. Add lead (optional). |
 |
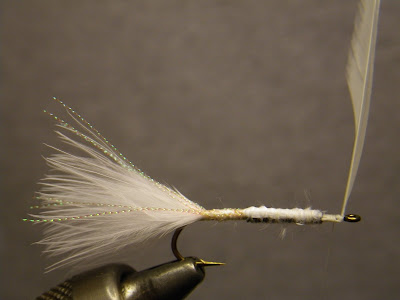
| Step Three: Tie in 4 strands of Krystal Flash. |
 |
| Step Four: Wrap back, separating evenly on both sides of the tail. |
 |
| Step Five: Advance thread to the eye of the hook. |
 |
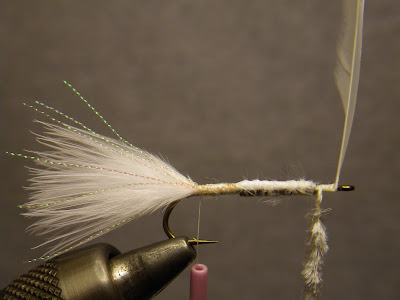
| Step Six: Tie in the base of the hackle stem directly behind the eye. |
 |
| Step Seven: Secure bare hackle stem to the shank by wrapping toward the back of the hook. This will ensure a solid tie-in of the hackle without slipping. |
 |
| Step Eight: Expose the thread core of the chenille before tieing in to reduce bulk. Tie in chenille behind hackle. |
 |
| Step Nine: Advance thread to tail. |
 |
| Step Ten: Wrap chenille back and tie off with three tight wraps of thread. |
 |
| Step Eleven: Wrap four turns of hackle at the eye and palmer the remaining hackle back. Secure hackle with three tight wraps. |
 |
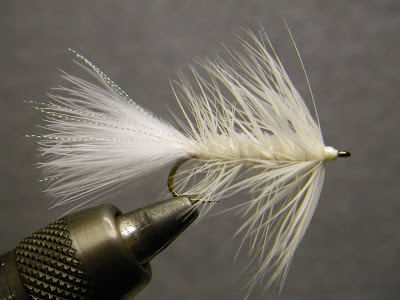
| Step Twelve: Palmer thread up through the hackle. This will reinforce the hackle, the main reason why I prefer to tie this fly in reverse. Comb hackle back and build a thread head. Whip finish. |
 |
| Finished Wooly Bugger |


No comments:
Post a Comment